kabirsaini
Member
Converting an OST file to a PST file manually can be time-consuming and technically demanding. Using a third-party tool like GoldyTools OST to PST Converter streamlines the entire process, making it quick, accurate, and user-friendly.
By using GoldyTools OST to PST Converter, you ensure a smooth, error-free conversion process—without needing advanced technical knowledge. This method is ideal for both individual users and IT professionals managing multiple mailboxes.
Let me know if you'd like a download link, system requirements, or help importing the PST file into Outlook.
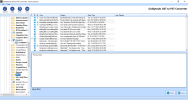
Step-by-Step Guide to Converting OST to PST:
- Download and Install
Download and install a trusted converter tool such as GoldyTools OST to PST Converter on your system. - Add OST File
Launch the application and upload the OST file you wish to convert. - Configure Conversion Settings
Choose the destination folder for the output PST file and apply any filters if needed (such as date range or specific folders). - Start the Conversion
Begin the conversion process with a single click. - Monitor Progress
Track the status of the conversion through the progress bar displayed in the interface. - Locate the Output File
Once the process is complete, find the newly created PST file in the selected destination folder. - Import into Outlook
Open Microsoft Outlook and import the PST file to access your converted data, including emails, attachments, contacts, and calendar items.
By using GoldyTools OST to PST Converter, you ensure a smooth, error-free conversion process—without needing advanced technical knowledge. This method is ideal for both individual users and IT professionals managing multiple mailboxes.
Let me know if you'd like a download link, system requirements, or help importing the PST file into Outlook.
Attachments
Last edited: